This project was one of the first on my DIY list as soon as I moved into this split-level home. Over the years I’ve bounced between LCD screens and projectors, finding pros and cons in each case. But, with 11′ tall walls it wasn’t really a choice whether 4K projector was the right choice. What was a tougher choice was how to build out the sound. Sound bars have come a long way, but the length of the room made them a sub-optimal consideration. In the end, I wanted to build in-wall speakers that were based on Monoprice Alpha series in a way that wouldn’t prevent a future potential of installing an indoor golf simulator.
How was it made?
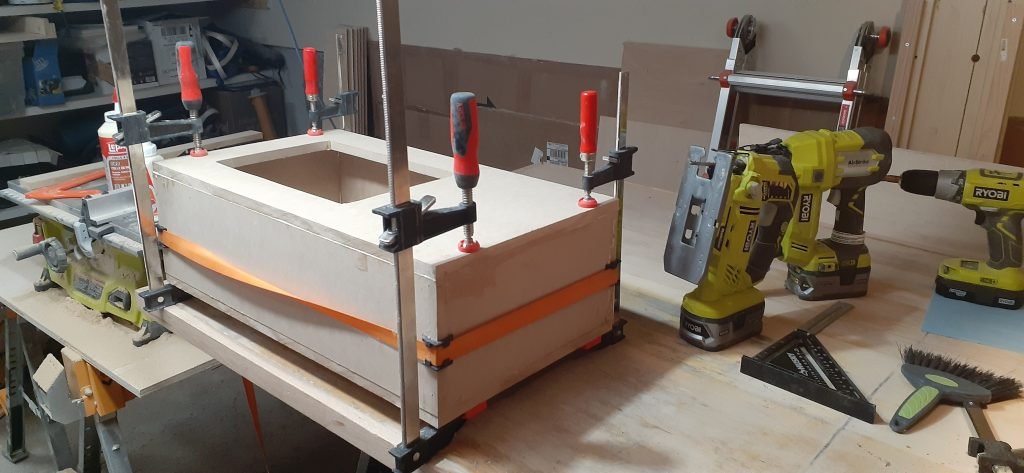
Build the speaker boxes
There are a seemingly limitless amount of resources on the internet related to optimal acoustic design for speakers. But building in-wall between the studs, with the future flexibility for a golf simulator in mind meant low profile boxes were the only real option. I think this might have been the first project I found/used opticutter for, and it made minimizing material lost to offcuts when working with the densest material (MDF) that my budget could afford very easy.
Paint the speaker boxes
The approach to painting the surface of the wall above the speakers would have far more of an impact on visual performance than the choices made for painting the speakers. But, it was also an excellent opportunity to get comfortable at using the air compressor spray gun connected to my workshop air compressor. It worked well enough, but I’ve since upgraded both the compressor and to a HPLV system that would have made this process far more efficient. Getting a paint with a tint that dries out would also have helped.

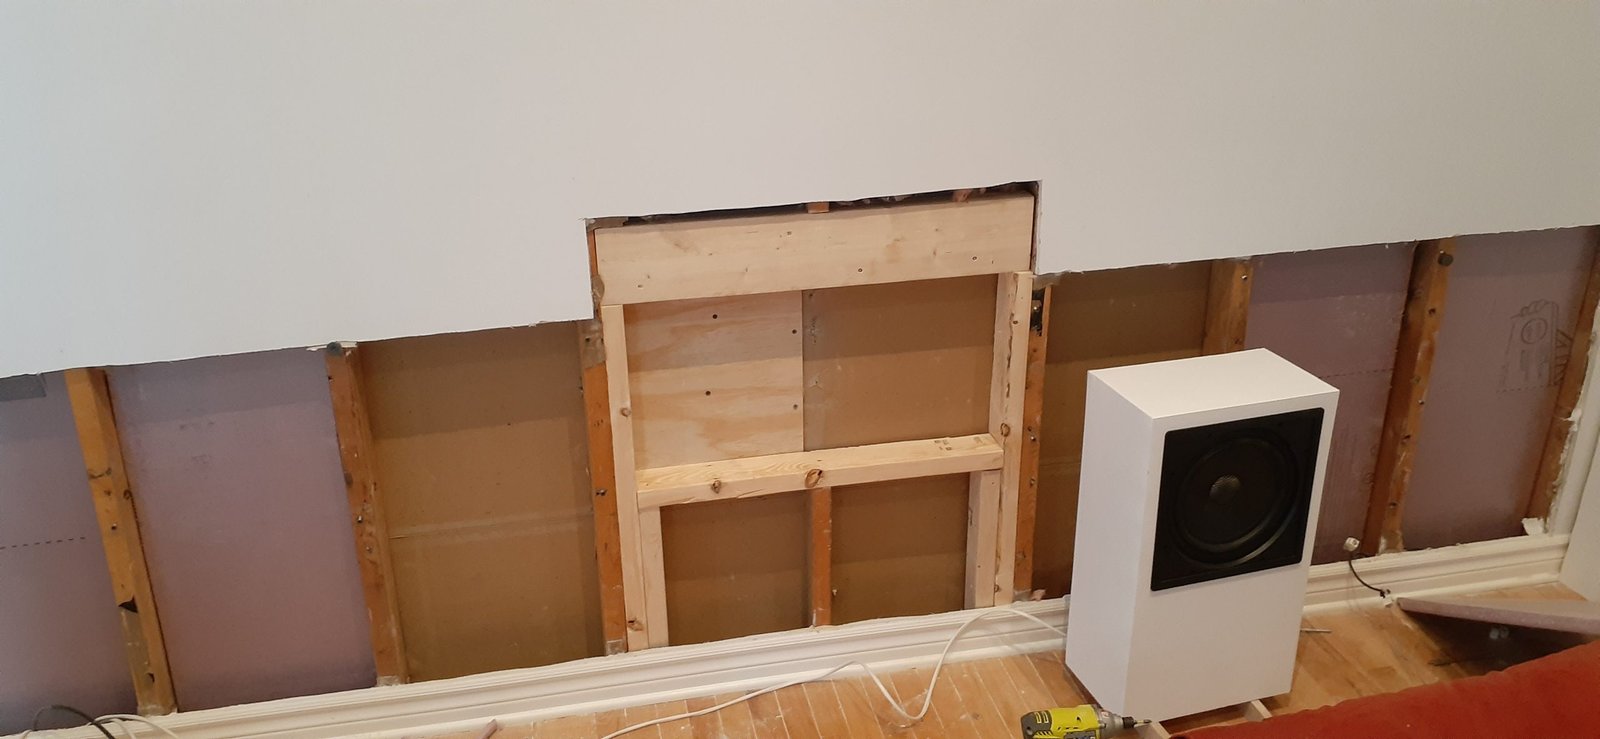
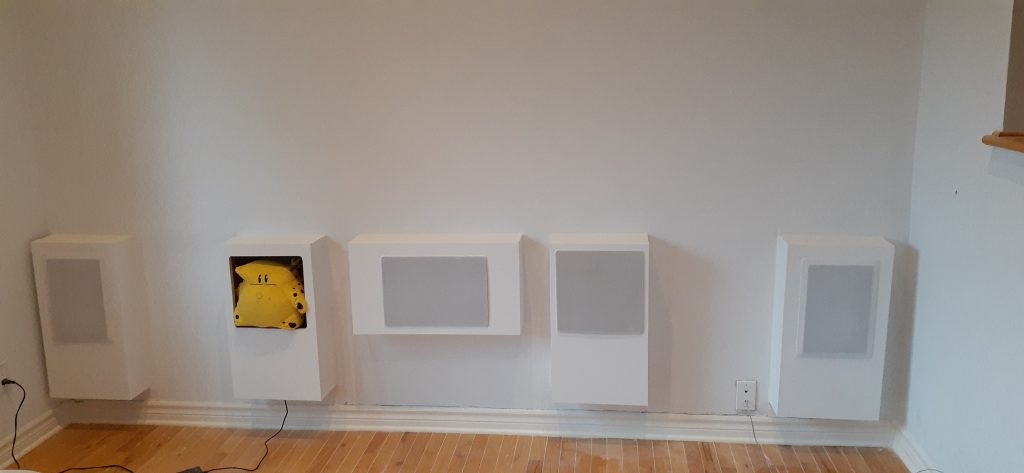
Prepare the wall for the speaker boxes
3 of the 4 speakers (front, left, right) were designed to fit exactly between the studs of the wall (16″ on center). The middle subwoofer had to cut across one stud.
Not surprisingly, there is very little written about speaker box load bearing wall weight support strategies on the Internet. So in the end, I treated it like I was installing a window and reframed a new header, jack studs underneath the new base.
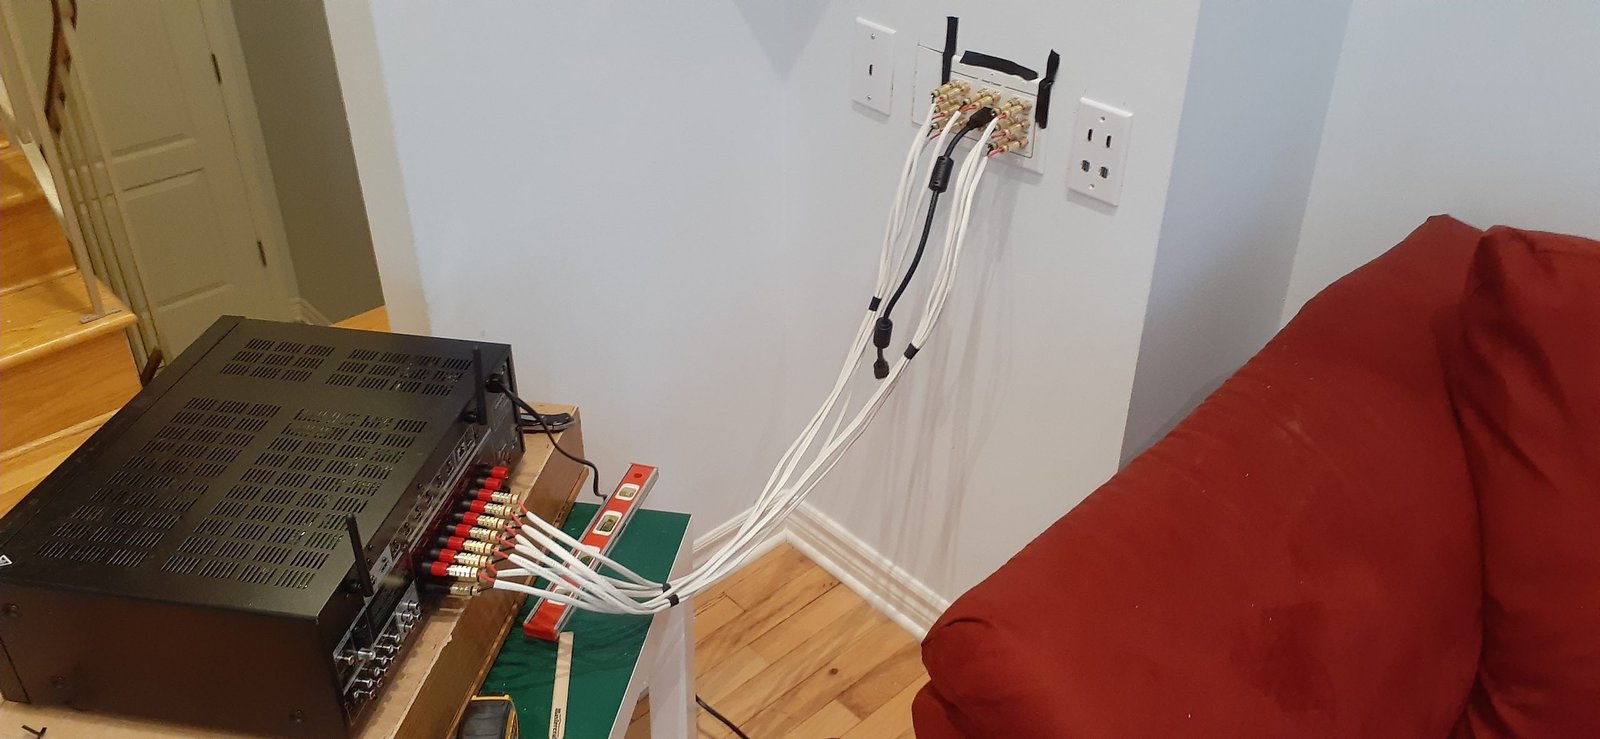
Running wires and installing A/V hardware
What would a home theatre build montage be without at least a couple of holes required for fishing wires through walls? Fishing wires for the fronts was a pretty easy down-over-and-up pathway because the corner where the A/V would be going has a cavity for air ducts behind it and the basement has drop ceiling tiles.
The ceiling work was a bit more of a challenge. Not just because of the 11′ wall heights and getting the projector mounted, but also for drilling across 4 joists to get atmos speakers for a Dolby 5.1.2 configuration.


Fake speaker box?
Symmetry matters, and so does height. If I put the center speaker above the sub, it would have been sacrificing screen real-estate. In the end, I chose to build an extra speaker box that has become a place for the controls for the powered sub to hide out. It’s also a bit of a hidey hole for my equivalent of the RCA dog with a Kick The Cheat. What better way to test out the now in-wall speakers than with some bass pumpin’ Homestarrunner Techno 😛
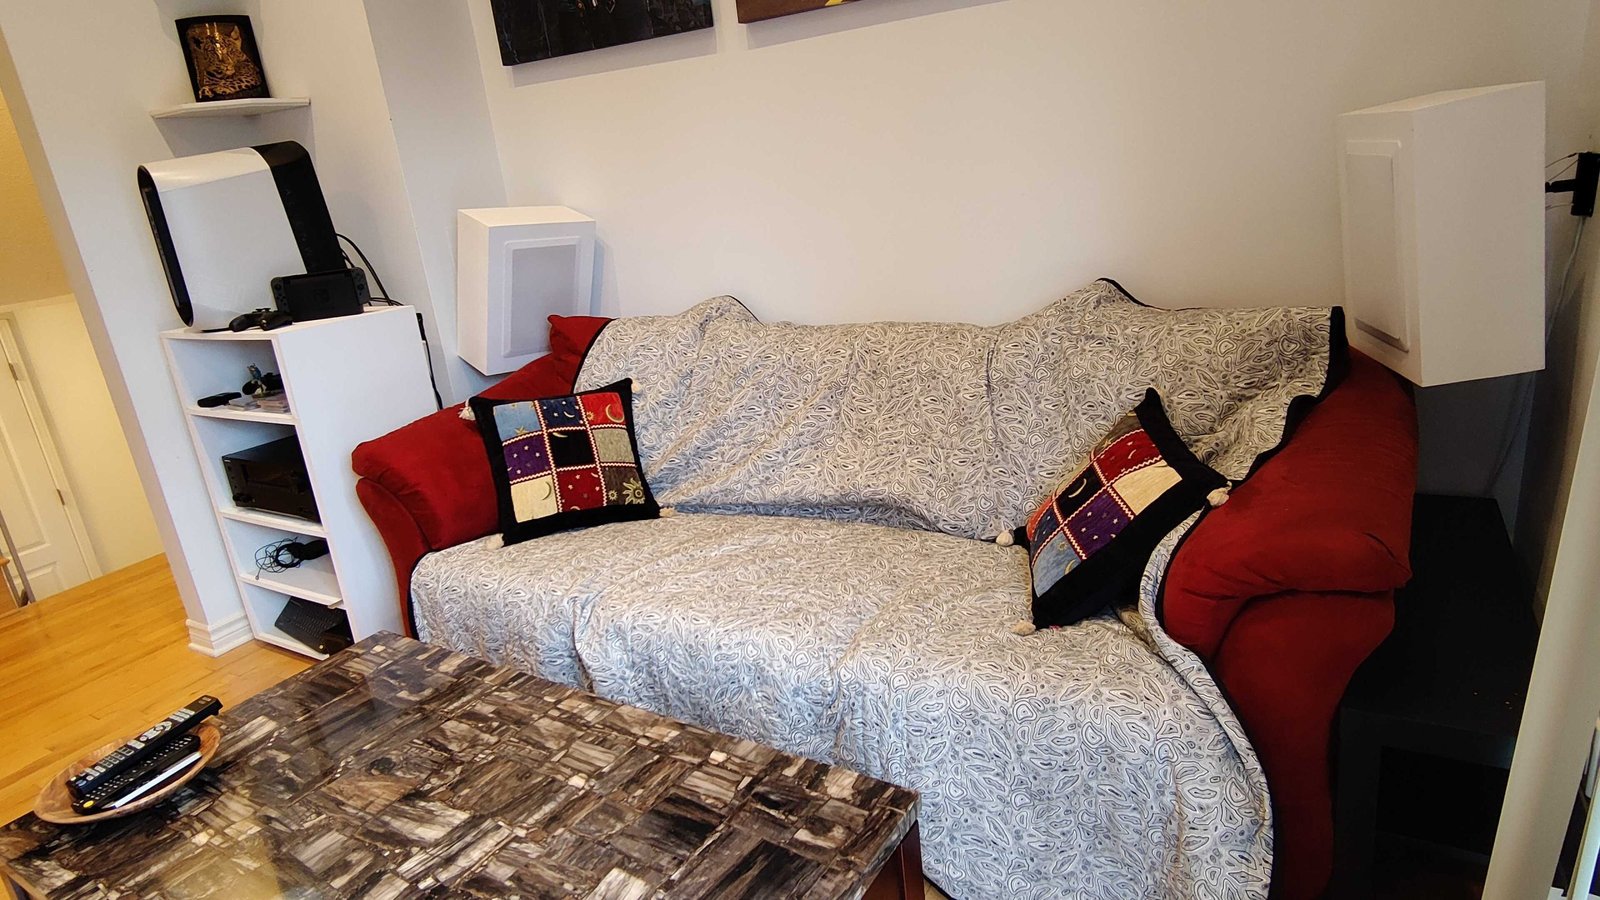
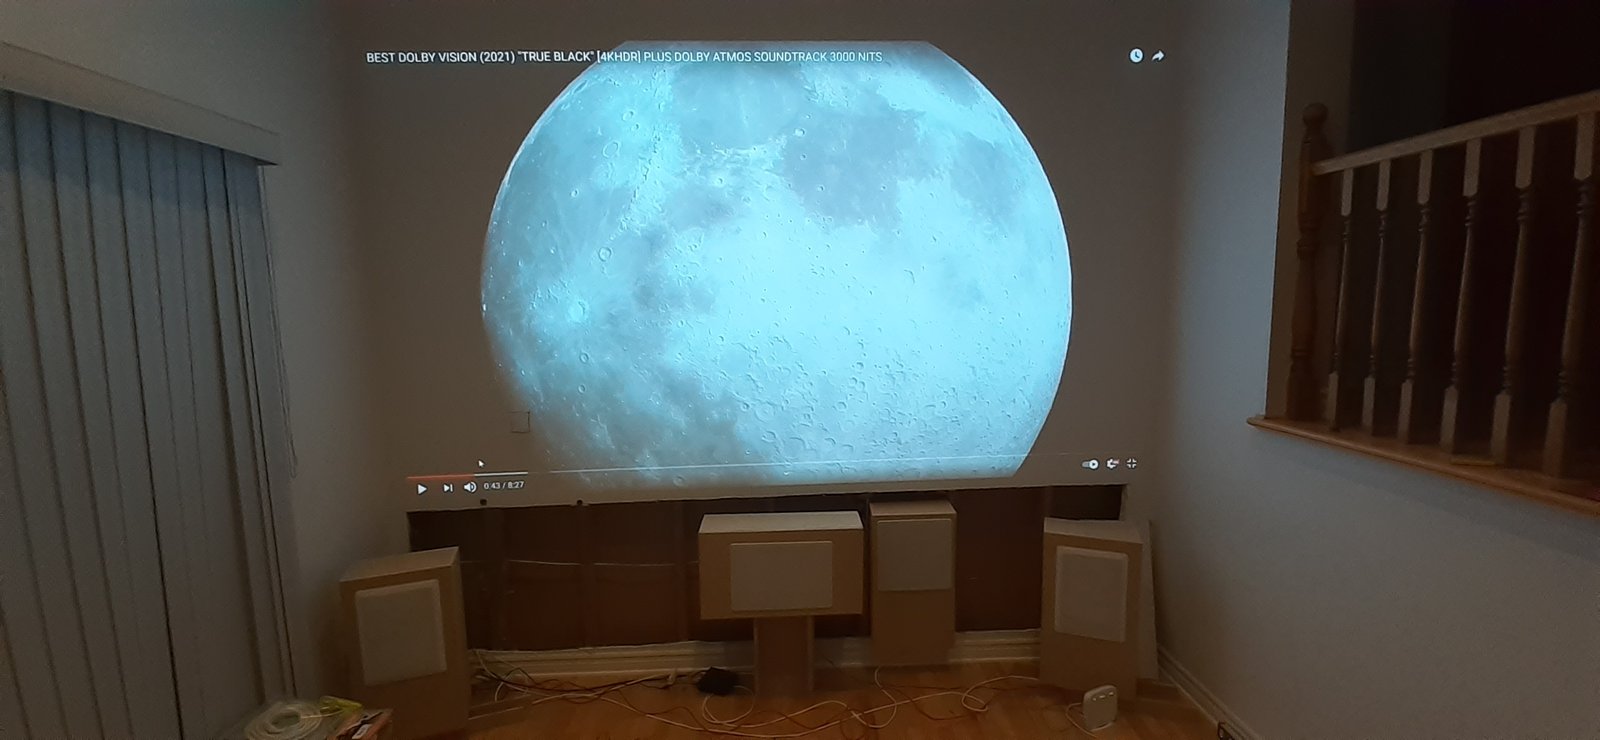
Enjoy new home theatre goodness
Over the years I’ve managed to cobble together pretty decent home theatre setups, although the sound component was often where I would shirk at price points. I wouldn’t call myself an audiophile by any stretch, but I do have a few friends that fill that role happily that provided strong recommendations on receiver, speaker components, etc. When I compare the amount of zeroes involved in their total project budgets versus what it took to bring this setup together in a way that is seen, heard and felt from the couch, I’m happy with the results.
Does this project catch your eye?
Please share a few words
to tell us why!
Are you captivated by this project? We’d love to hear from you! Whether you’re envisioning something similar for yourself, found inspiration as a fellow maker, or have ideas to enhance future creations, connecting with those who appreciate Idealien Studios’ work fuels our passion.